 Mail
Mail
 Messages
 Office
 Notes
Notes
 Meet
Meet



Views and filters
You can filter and sort a table to see only what you need, and create several views of the same data.
Filter a column:
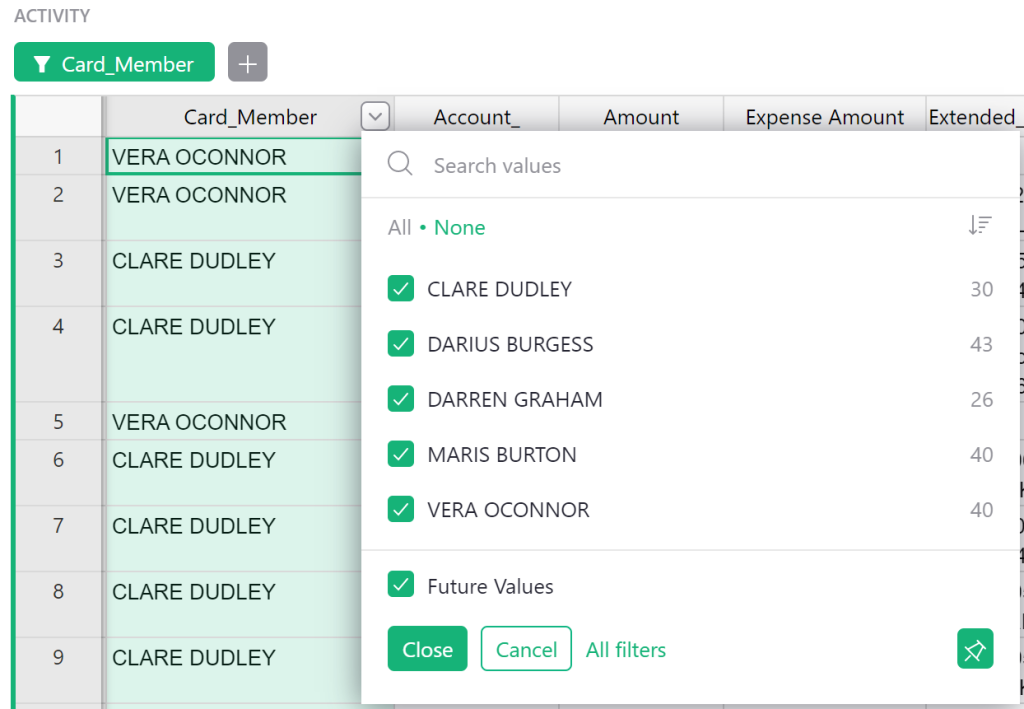
- Open the menu in the column header and select Filter Data.
- Untick the values you do not want to see, or click None and tick only the values you do want. The table updates as you go.
- Click Close to close the box.
The filter is pinned as a button above the table. You can filter on several columns at once, in which case only the rows matching all filters are shown.
Sort a column:
- Open the menu in the column header and select Sort.
- Choose ascending or descending order.
- To sort on several columns, open the menu in the next column and select Add to sort.
Sorting and filters only affect your own view until you save them. Click Sort and filter above the table and choose Save if everyone with access to the document should see the same setting.
Create a new view:
- Click Add new in the left panel.
- Choose Add page for a new page, or Add widget to page to place a view alongside an existing one.
- Choose a type: Table, Card, Card List, Form, Chart, Calendar or Custom.
- Choose which table the view should draw its data from, and confirm.
Views show the same data but have their own sorting and filter settings. You can have one page showing confirmed sign-ups and another showing the pending ones.